Category Archives: FreeBSD
Setting Up Your First VPS FAMP Stack
Date published: April 6th, 2012
Posted in FreeBSD | 3 Comments »
by: Diego Montalvo
RootBSD VPS instances are installed with a current version of FreeBSD and with SSH access but nothing else. In this tutorial, you will learn how to update the ports tree and install PHP, Apache, and MySQL (FAMP Stack) on your VPS.
Logging in as root is disabled so you should login using the provided SSH user name and password provided by RootBSD. Once you have successfully logged into your VPS you may simply “su” to root.
Before we begin to install any ports, it is recommended that you update the ports tree so that any port you intend to build is the most current version.
Upgrading Ports Tree Using Portsnap
| # portsnap fetch update |
Installing Apache 2.2.x
First, we are going to install Apache HTTP Server.
| # cd /usr/ports/www/apache22 # make install clean |
| Choosing the default options will do just fine. Installation will take a few minutes.
|
| Figure 1. Apache Options Screen
|
| Wait for installation to complete. |

To run Apache web server from startup append the following to the “rc.conf” file.
| apache22_enable=”YES” |
Starting and Stopping Apache
| apachectl start |
| apachectl stop |
Once Apache has been successfully installed you can open your VPS address in a web browser and you should see the following text “It works!”
Potential Issues
You may run into some issues when starting Apache for the first time. Two of the most common are hostname and accf_http issues.
Hostname issues:
If you start Apache and the server throws back the following error:
httpd: apr_sockaddr_info_get() failed for XXXX
httpd: Could not reliably determine the server’s fully qualified domain name, using 127.0.0.1 for ServerName
You need to set your hostname. This can be done by editing /etc/rc.conf:
hostname=”x.x.xxx” < – Your server’s fully qualified domain name (FQDN).
accf_http
You may also get an error that looks like:
[warn] (2)No such file or directory: Failed to enable the ‘httpready’ Accept Filter
This is especially common on FreeBSD systems. To solve the problem follow these steps:
Type the following at the CLI:
# kldload accf_http # echo ‘accf_http_load=”YES”’ >> /boot/loader.conf
Restart Apache. (/usr/local/etc/rc.d/apache22 restart)
Installing PHP 5.3.x
| # cd /usr/ports/lang/php5 # make install clean |
| Note: Select “Build Apache Module”
|
| Figure 1. PHP 5.3.x Options Screen
|
| Wait for installation to complete. |
| # php -v will output the version of PHP installed. |

In order for PHP to parse correctly you must add a few lines to the Apache “httpd.conf” file.
| # cd /usr/local/etc/apache22/
# ee httpd.conf |
| AddType application/x-httpd-php .php AddType application/x-httpd-php-source .phps
|
| Figure 2. Adding lines to Apache “httpd.conf” file |
|
|
 |
| Figure 3. Add index.php before or after index.html |

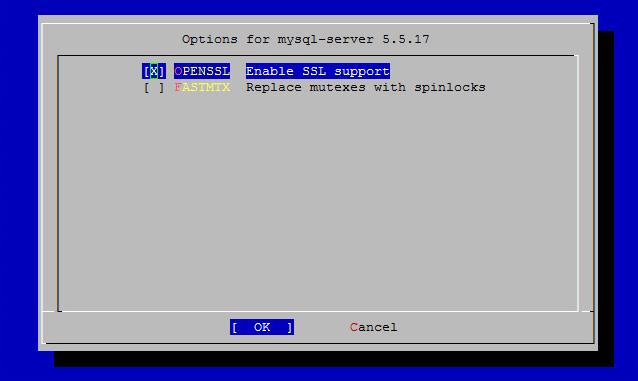
Installing MySQL
| # cd /usr/ports/databases/mysql55-server
# make install clean |
| Choosing the default options will do just fine. Installation will take a few minutes. |
| Figure 5. Installing MySQL With Default Options
|
| To run MySQL from startup append the following to the “rc.conf” file. |
| # mysql_enable = “YES”Once MySQL has been installed you can start it using either of the following commands:
# /usr/local/etc/rc.d/mysql-server start or # service mysql-server start |

It is strongly recommended to set a sysadmin (root) password for MySQL.
| # mysqladmin -u root password
New Password: <enter password> |
Additional Modules
Once you’ve installed the main components you may need to install some additional modules for everything to work well together. Three commonly used modules are:
/usr/ports/databases/php5-mysql
/usr/ports/www/php5-session
/usr/ports/graphics/php5-gd
For all of these just “cd” to the above directories and run (default options are fine):
# make install clean
Then restart Apache. (/usr/local/etc/rc.d/apache22 restart)
Finished
Once all three components are installed and configured you’re ready to start setting up a database driven site or application. To verify that everything is working correctly you can use a phpinfo test page.
Navigate to your web root (by default /usr/local/www/apache22/data), and enter the following:
# echo “<?php phpinfo(); ?>” > test.php
Now you should be able to open your VPS address in your browser and navigate to test.php (ex: 199.199.199.1/test.php). You should see a page showing your PHP version, as well as info on installed modules (including mysql).
| Resources | |
| FreeBSD | Http://www.freebsd.org/ |
| Apache Foundation | http://www.apache.org/ |
| MySQL | http://www.mysql.com |
| PHP Official Site | http://www.php.net/ |
MaheshaBSD by Juraj Sipos – A RootBSD hosted project
Date published: March 16th, 2012
Posted in FreeBSD, RootBSD | No Comments »
Juraj Sipos
http://www.freebsd.nfo.sk/maheshaeng.htm
Introduction of MaheshaBSD-2.0 – What’s New On The Lake Manasarovar?
MaheshaBSD-2.0, a FreeBSD Live CD (modular/education/presentation/rescue toolkit) based on FreeBSD 9.0, is introduced in this article. The Live CD was released in February 2012. The article will summarize the news in the new version of this distribution (for example, a possibility to use 4 keyboard layouts also with Devanagari, the author’s Xmodmap solution, and many other things). The name MaheshaBSD is derived from Mahesha, one of the names of Lord Shiva. The name was chosen because Lord Shiva is armed with the same weapon as FreeBSD – the trident (trishula in Sanskrit).
Brief introduction of the project
The full article about MaheshaBSD-2.0 was first published in the 2012 March issue of the BSD Magazine. You can see more details and pictures at the reference link.
To quickly recap what MaheshaBSD is, how it works and what it offers, the following points will put you into the correct light:
MaheshaBSD is a modular (and rescue/education/presentation) toolkit. MaheshaBSD’s purpose is to bring some useful system/recovery utilities to people, but on the BSD platform – like TestDisk (which will recover lost partitions), PhotoRec (which will undelete files; it can also undelete files on USB memory sticks), Clamav (antivirus software), immediate NTFS R/W access (with ntfs-3g), chntpw (for resetting the Windows XP/W2K passwords, a very practical utility), FTP server (which immediately works without need to configure anything), MPlayer (to watch films; DivX and many other codecs are supported), and many other things – for example, MaheshaBSD can be used for presentations (you can bring it anywhere with you and show thousands of pictures to people, or present videos while giving a lecture, or watch videos with friends), or easily let your documents speak their contents for you with the MaheshaBSD’s built-in speak (espeak) functionality (a very useful thing for blind people).
Linux emulation is activated. You may run Skype or any Linux software under condition that you also have the necessary libraries. For that reason, the static versions of Linux binaries are recommended.
The MaheshaBSD’s modularity feature, too, is very useful – you may place a tweaked mfsroot.gz file into the MaheshaBSD’s /boot directory. This means that you can prepare router/ftp server/www server and so on that will suit your particular needs.
MaheshaBSD is not for everyday use. It is a recovery toolkit that can be also used for presentations, etc., and it serves this purpose only for a couple of hours. Its FTP server (vsftpd) is your door to log into any computer running MaheshaBSD (a broken notebook, for example) and save (copy) your data. You may also delete defective software on your Windows NTFS partition (to mount it in the NTFS R/W mode, use ntfs-3g – it works immediately).
MaheshaBSD will help you be anonymous on the Internet (with tor and polipo [a proxy server]).
You may choose national keyboard layouts in the IceWM’s menu (German, Russian, Czech, Slovak); dead keys work too.
You may write documents in the Seamonkey’s Composer component (HTML editor). Click on the “Write documents” icon in IceWM. You can also download dictionaries and spellcheck your texts.
Sample use cases
1) Your notebook falls down on the floor and the screen gets broken. You are not a techie and you do not know how to get your hard disk out of your computer. With the built-in MaheshaBSD’s FTP server (vsftpd) you may log in to your computer via SSH and get to your files.
2) You may run the Clamav antivirus software from within the MaheshaBSD’s environment.
3) You may recover lost files/partitions (TestDisk, PhotoRec).
4) You are a Windows user and you need to reset your Windows password.
5) Many other possibilites…
Security
If you want to complain that running Skype in the MaheshaBSD’s /tmp directory is not a wise idea, I emphasize again that MaheshaBSD should be used only for a couple of hours (and under condition that all your hard disks and cellular phones fail, so there is really no need to complain about security) and mostly as a recovery toolkit. The above points, as you see, already express the essence of the MaheshaBSD’s objectives and there is really no need to worry about security. Nevertheless, if you want to complain, run Skype in your Linux /etc directory and not in the MaheshaBSD’s guest account (which is always available for you:).
What’s new in MaheshaBSD-2.0?
MaheshaBSD-2.0 is based on FreeBSD 9.0-RELEASE (i386), and it was released on February 7, 2012.
MaheshaBSD-2.0 is now Skype ready – that is, you do not need anything to install to use Skype (some Linux libraries were missing in MaheshaBSD-1.0). This Live CD contains instructions on how to put MaheshaBSD on a USB memory stick and you may carry it with you also with the Skype Linux static binaries.
Youtube videos now run without need to install Adobe Flash Plugin from the Internet (but without native Adobe Flash).
X Window may now be started with the startxaut (start X automatically) script, which will generate the /etc/X11/xorg.conf file (with the command Xorg -configure) and the X Window GUI environment will start automatically without any manual configuration.
MaheshaBSD-2.0 has a new logo (Manasa Devi). Manasa Devi, the Naga Goddess of the underground (Patala), is the daughter of Lord Shiva.
MaheshaBSD-2.0 has a special Xmodmap map with Devanagari and IAST support; it is in the More Progs IceWM’s menu. You may use 4 keyboard layouts with it (to switch between them, use CAPSLOCK).
Conclusion
The pull behind the MaheshaBSD project is to support and spread words about FreeBSD. Its Hindu touch is geared toward the same purpose, because there are still many people who have never heard of FreeBSD. If they search for some Hindu keywords, they may possibly find it and try it and convince their neighbors that FreeBSD is not only for the techies. In the future, MaheshaBSD will always keep its original contours, because a possibility to type wise ideas in Sanskrit or IAST transliteration of Sanskrit will make many people look out of their (Linux) Window(s).
Reference Links
Project home page (with download): http://www.freebsd.nfo.sk/maheshaeng.htm
RootBSD Hosting: http://www.rootbsd.net
BSDMag (with download): http://bsdmag.org/magazine/1795-nessus-exploitation-tools-and-payloads
Administering FreeBSD Using Webmin
Date published: August 17th, 2011
Posted in Apps, FreeBSD | 2 Comments »
by: Diego Montalvo
Since I began using FreeBSD 4.x, I quickly learned of Webmin, a web-based server administration tool, which allows administrators to manage everything from: Mysql, Apache, Sendmail, system processes, networking and much more. One of the coolest features of Webmin is it’s modular structure. Modules can easily be downloaded and installed to fit your specific server needs. In this quick tutorial you will learn how to install and use Webmin.
Even though Webmin will not fully replace SSH or physical access to your server. Webmin will allow you as the admin to manage and perform the most common server tasks easily via a web browser. Happy Webmin-ing!
How to mirror FreeBSD with CVSup
Date published: July 22nd, 2011
Posted in FreeBSD | No Comments »
The following was done with FreeBSD 8.2-RELEASE.
CVSup is a highly efficient way of distributing files. It works similar to rsync, but was specially designed for use with CVS repositories.
Requirements:
- 5.4 GB disk space ( an additional 10-20% more free space is recommended)
- >= 2GB RAM
- A decent CPU as CVSup can be CPU intensive
- A fast disk subsystem (RAID highly recommended)
- Good network connection
Building your own CVSup mirror is made easy by the port net/cvsup-mirror.
# cd /usr/ports/net/cvsup-mirror
# make install clean
You will be prompted for a master site for you updates. Choose a mirror from the CVSup Sites list .
Follow the instructions (Note: If you would also like to mirror the WWW data, this is a very easy way to do it. Select ‘y’ when prompted):
I am going to ask you a few questions so that I can set up your
FreeBSD mirror configuration. Every question has a [default]
answer. To accept the default, just press ENTER.At this point, I am just gathering information. I will not touch
your system until you type “make install”.Master site for your updates [cvsup-master.freebsd.org]? cvsup9.us.FreeBSD.org
How many hours between updates of your files [1]? [Enter]Now you must decide which sets of files you wish to make available
from your mirror site. You can choose any combination, and you
can put each set anywhere you want to on your disks. Although each
set is optional, we strongly encourage every mirror site to carry
at least the main source repository.Do you wish to mirror the main source repository [y]? [Enter]
Where would you like to put it [/home/ncvs]? [Enter]
Do you wish to mirror the installed World Wide Web data [y]? n
Do you wish to mirror the GNATS bug tracking database [y]? n
Do you wish to mirror the mailing list archive [y]? nNow, a few questions so that I can set up your CVSup server properly.
For security reasons, both the CVSup client and server should run
under their own unique user and group IDs. These IDs should have no
special access privileges. Normally, the user:group “cvsupin:cvsupin”
is used for the client and “cvsup:cvsup” is used for the server, but
you can choose other names if you wish. At “make install” time, I
will create the users and groups, if they don’t already exist.Use unique user and group IDs for these. Do not use “nobody”,
“nonroot”, or “nogroup”.Unique unprivileged user ID for running the client [cvsupin]? [Enter]
Unique unprivileged group ID for running the client [cvsupin]? [Enter]
Unique unprivileged user ID for running the server [cvsup]? [Enter]
Unique unprivileged group ID for running the server [cvsup]? [Enter]The CVSup server does its logging via syslog. At “make install”
time, I will set up the logging for you, if necessary. I will use
the “!program” feature of syslog to keep your CVSup log messages
separate from the messages of your other daemons.Syslog facility for the server log [daemon]? [Enter]
You can control the load on your machine by limiting the number of
clients that the CVSup server will serve at once. CVSup won’t load
your network especially heavily, but it is more CPU and disk
intensive than most other file server software.Maximum simultaneous client connections [8]? 10
Later, it will prompt you again with more questions:
You need a group “cvsup”.
Would you like me to create it [y]? [Enter]You need a user “cvsup”.
Would you like me to create it [y]? [Enter]You need a group “cvsupin”.
Would you like me to create it [y]? [Enter]You need a user “cvsupin”.
Would you like me to create it [y]? [Enter]Would you like me to create cvsupin’s home directory (/home/cvsupin) [y]?
The port should now be installed and ready for configuration.
First, comment out the line added to /etc/crontab. You can adjust the time for the update to script to run if you desire:
# vi /etc/crontab
There should be a line that looks similar to this:
#6 * * * * root /usr/local/etc/cvsup/update.sh
If you would like to further restrict access you can configure your cvsupd.access file:
# vi /usr/local/etc/cvsup/cvsupd.access
Below is what should be there originally:
-0.0.0.0/0 10 # Limit total connections
-0.0.0.0/0/32 1 # Allow only 1 connection from each host
+0.0.0.0/0 # If we reach this rule, we let the client in
Now you should be ready run your first update. This will take some time as it downloads the entire repository.
# /usr/local/etc/cvsup/update.sh
Once that is done, uncomment the line in /etc/crontab.
Add a line to /etc/rc.conf for cvsupd:
# vi /etc/rc.conf
cvsupd_enable=”YES”
Then start cvsupd:
# /usr/local/etc/rc.d/cvsupd start
Your CVSup mirror should now be working!
Other notes:
CVSup requires incoming connections on port 5999 so add a firewall rule if necessary.
If you encounter trouble, check /var/log/cvsup.log and /var/log/cvsupd.log .
— Rob Lampe