RootBSD Now Offering Self-Service SSL Certificates
Date published: August 13th, 2016
Posted in Announcements | No Comments »
With RootBSD’s new self-service SSL Certificates, you can now purchase SSL certificates from directly within our customer portal. We offer a wide variety of certificates from various Certificate Authorities that you can choose from depending on your specific security requirements and certification length needs. Prices start as low as $10.35 a year!
SSL Certificate Purchasing Guide
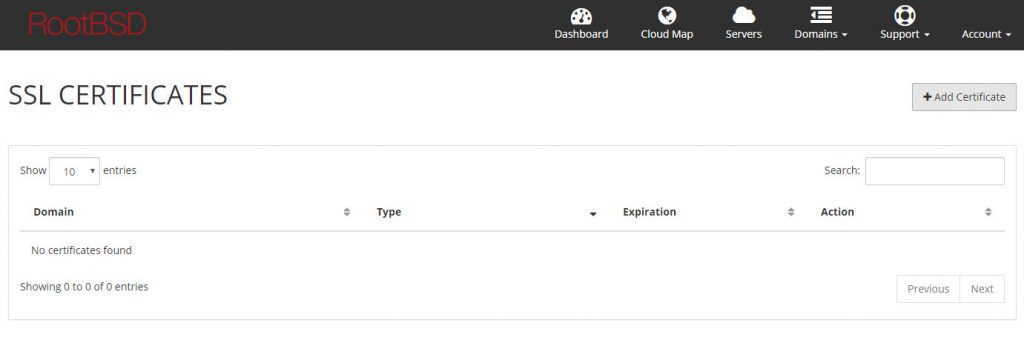
- The first thing you’re going to want to do is log into your customer portal and navigate to the SSL Certificate section of your account.
- Once at the SSL overview page, you want to click “+ Add Certificate” in the top right.
- A dialog box will pop up. This will list the available options we provide for the various SSL providers, duration of the certificate, as well as their prices. Note that when purchasing SSL certificates for 2 or more years, you receive a discount. The discount is notated off to the side near the price list.
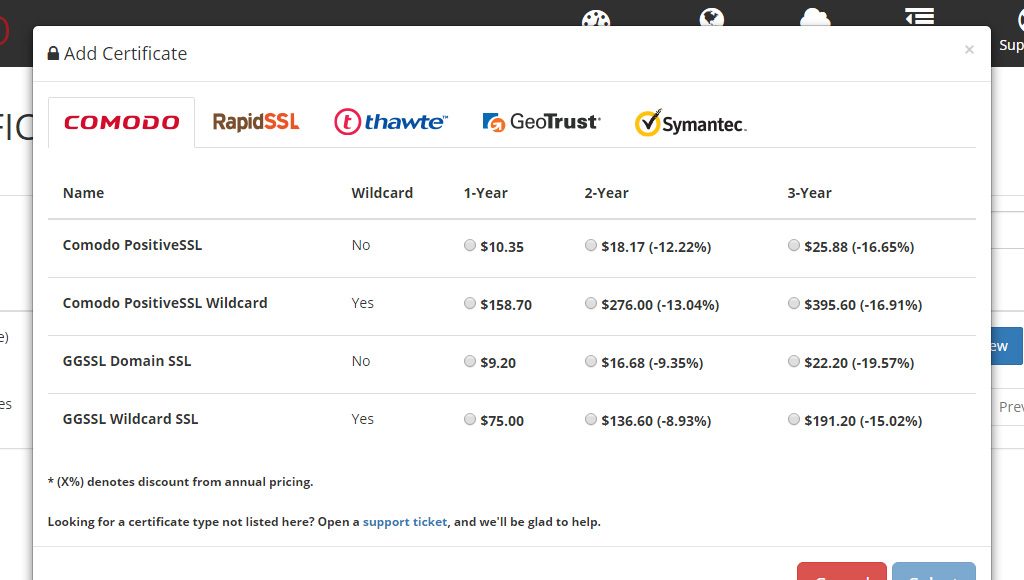
- Once you have chosen your preferred SSL option, click Select. You will then be taken to a confirmation box that will display the SSL you chose. If everything looks correct, click the Confirm button.
- Once you have Confirmed your SSL order, you will need to pay the invoice with any of the options we provide (e.g. Credit Card, PayPal, Account Credit, etc).
- After payment of the invoice has been processed, you will see the new SSL certificate listed in your SSL Certificates overview page.
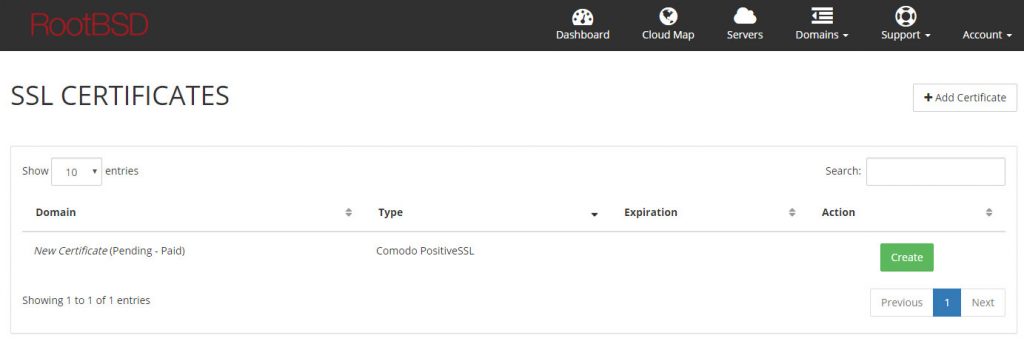
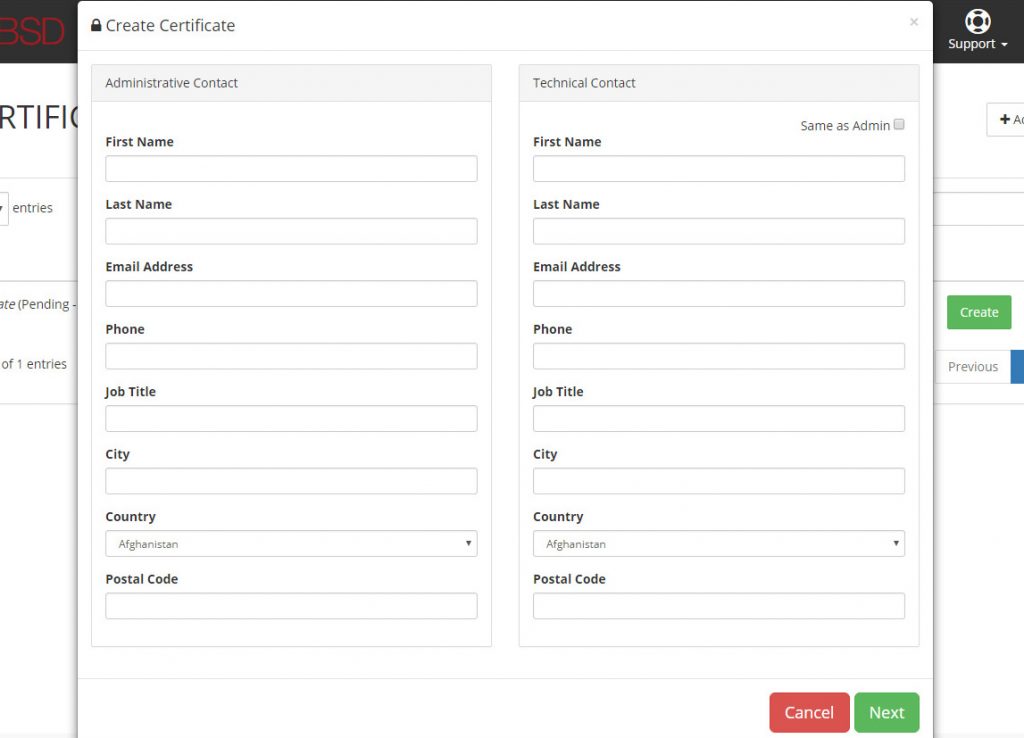
- For your newly purchased SSL Certificate, you will see the green Create button to the right in the list. Click to Create, and a dialog box will open. Please fill out the information as appropriate as possible (depending on the SSL Certificate provider you chose, this information can be very crucial to the SSL certificate being validated). If you’d like to fill in the Technical Contact information with the same as the Administrative Contact, simply check the box at the top right saying Same as Admin.
- After filling out the above contact information and clicking next, you will be asked for the Server Type of the server the site is hosted on, as well as the CSR (Certificate Signing Request). Most web hosting control panels (e.g. cPanel / WHM, DirectAdmin, ISPConfig) have a built-in CSR generator, but in case you’re not familiar with using it or you’re simply not using a web hosting control panel, you can access our CSR Generator Tool by clicking on the link at the bottom of the dialog box.
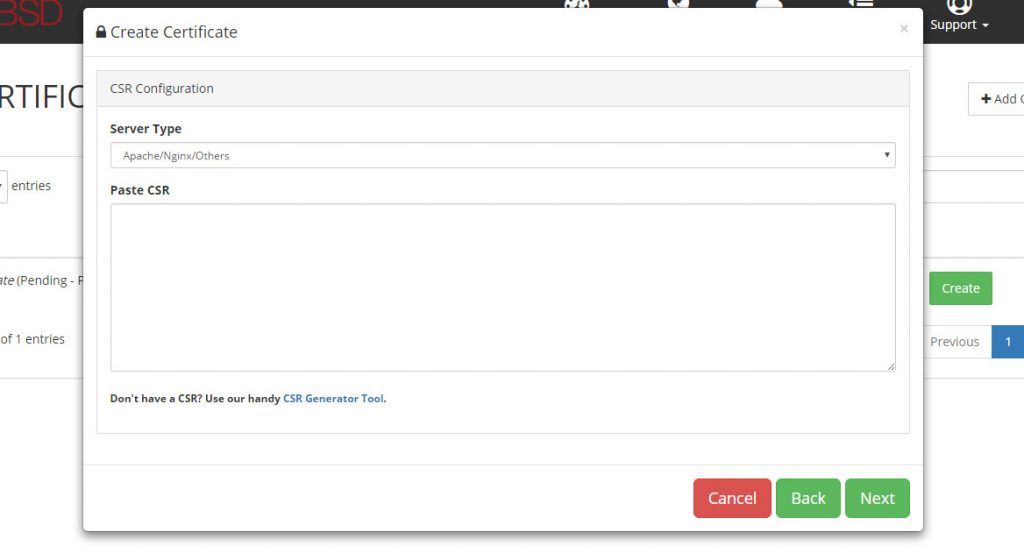
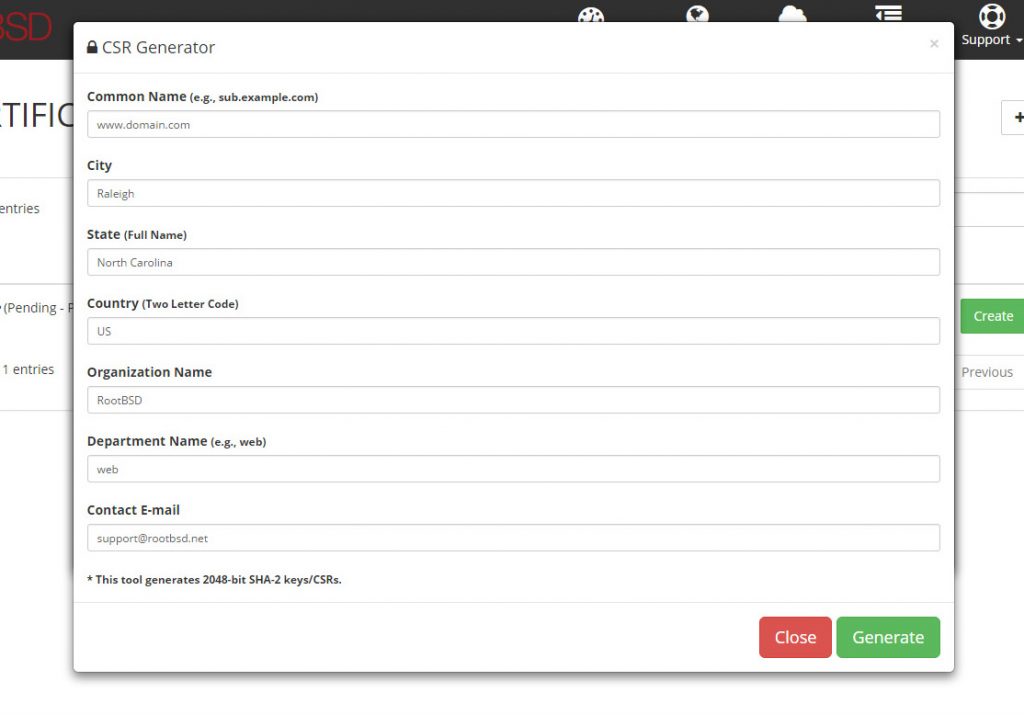
- The CSR Generator Tool asks for the basic information of your domain and contact information. Once again, be sure to fill out this information as appropriate as possible. Also it is critical that the Comon Name is 100% correct.
- Once the information has been filled out and you have hit the Generate button, the tool will then provide you with the CSR as well as the Key (Private Key). It offers it in raw text that you can copy and paste, or you can click the Download Zip button to download a zip of the files to your local machine.
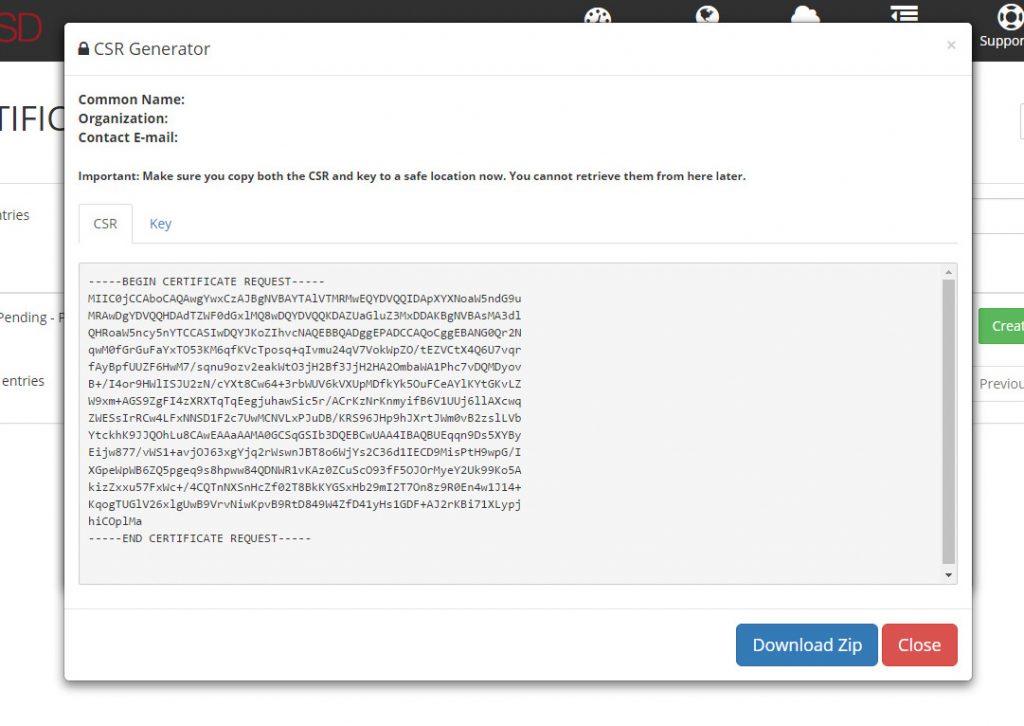
- Once you have obtained the CSR and Key, it is safe to close out this dialog box. This will bring you back to the CSR Configuration page. You will simply fill in the information requested such as the Server Type and the newly acquired CSR that you generated above with our tool. Then click Next.
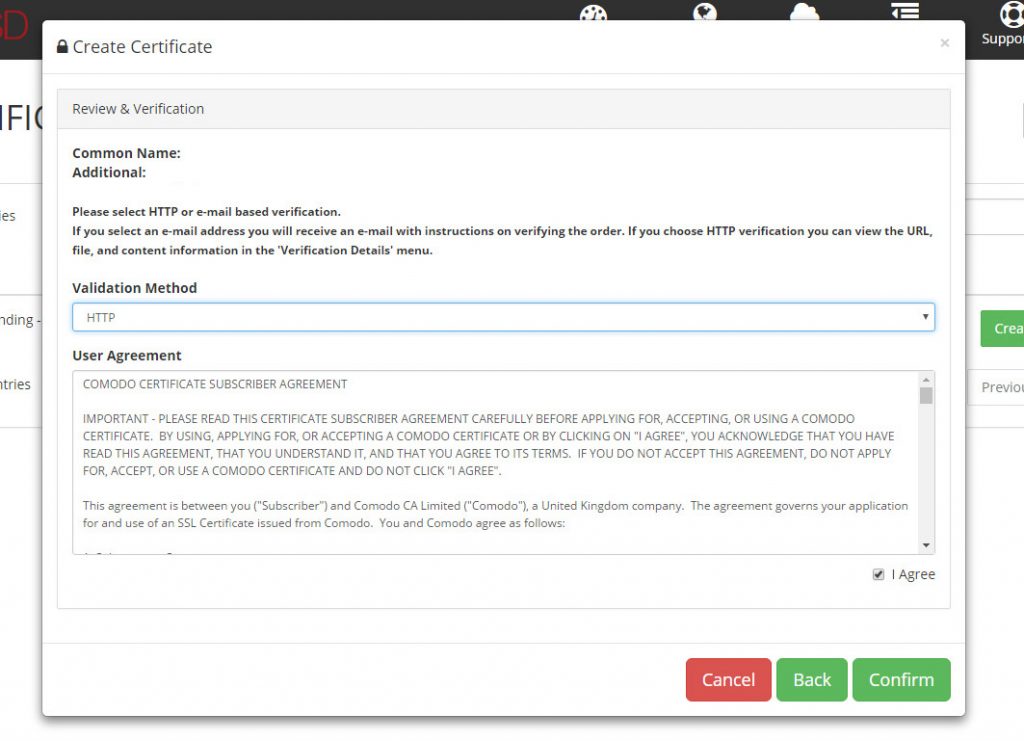
- The next step is the Review & Verification step – this is where you verify the Common Name is correct and also choose your method of validation. Any method you choose will work (provided that the email addresses are valid), however we will continue this guide with the HTTP Validation Method. This simply gives you a .TXT file that you upload to the root directory of your site’s public HTML folder. So select HTTP from the dropdown Validation Method, click the checkbox to agree to the User Agreement, and click the green Confirm button.
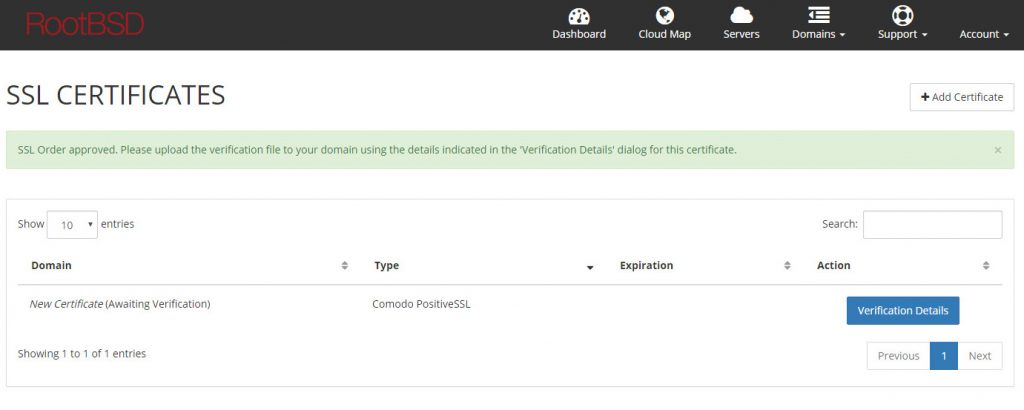
- Once you have hit the Confirm button, you will be taken back to the SSL Certificate overview page stating that your SSL Order has been approved. Next we will need to get the details of the validation file and upload it to your website’s / domain’s root public HTML directory. So if looking at the list of certificates, click Verification Details on the right side.
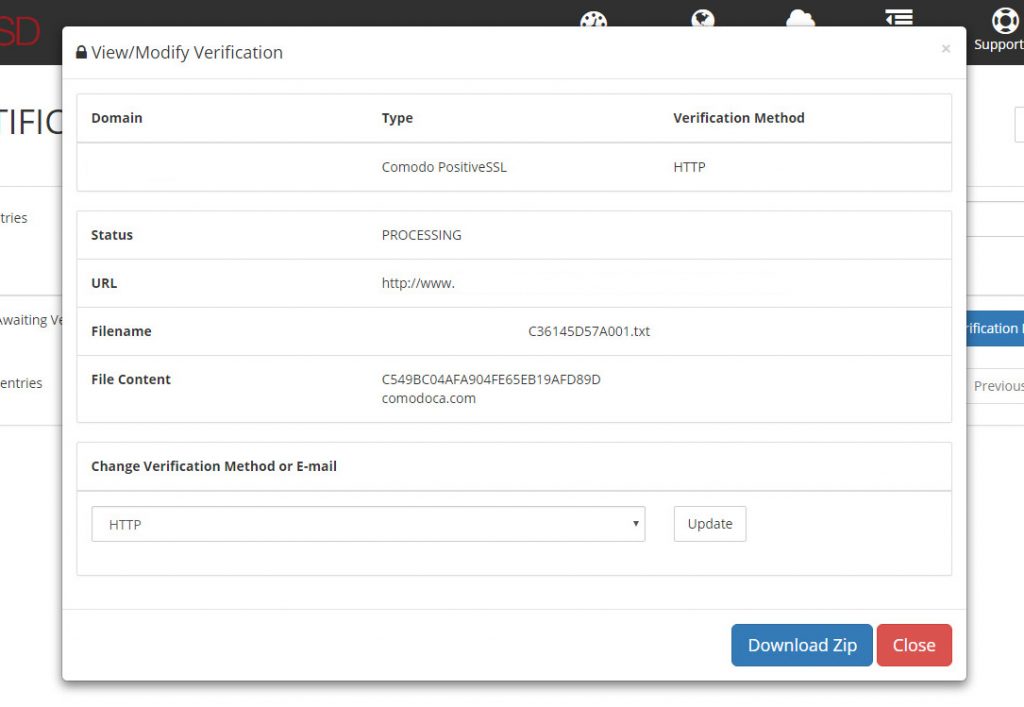
- This will bring up a page that provides you with all the information pertaining to the status of your SSL Certificate request and the details of the chosen validation method. In this case, we chose the HTTP File validation, so this page provides you with the filename, the file contents, as well as the full URL where the Certificate provider will be crawling to validate your request. You can either create the file manually by copying and pasting the information that is provided to you on this page, or you can simply choose to download the file via the Download Zip button at the bottom. You can also change your verification method at this page if needed.
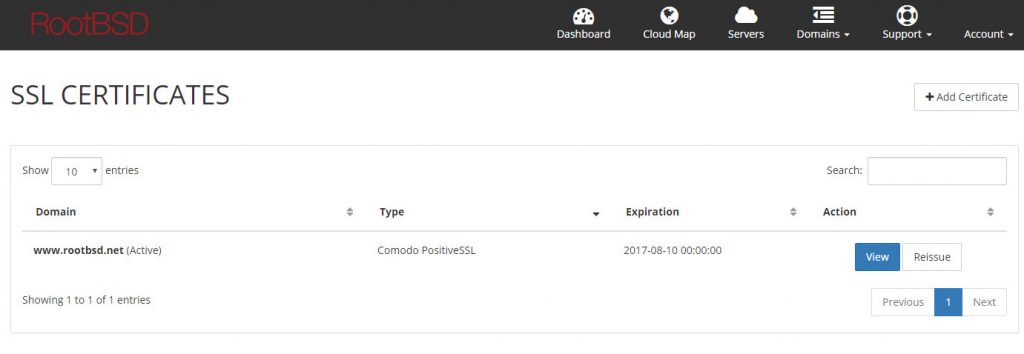
- Once you have uploaded the validation file to the site’s root public HTML directory, please allow up to 10 minutes for the verification process to complete. Once the process has completed, the domain will show in your list of SSL Certificates as Active.
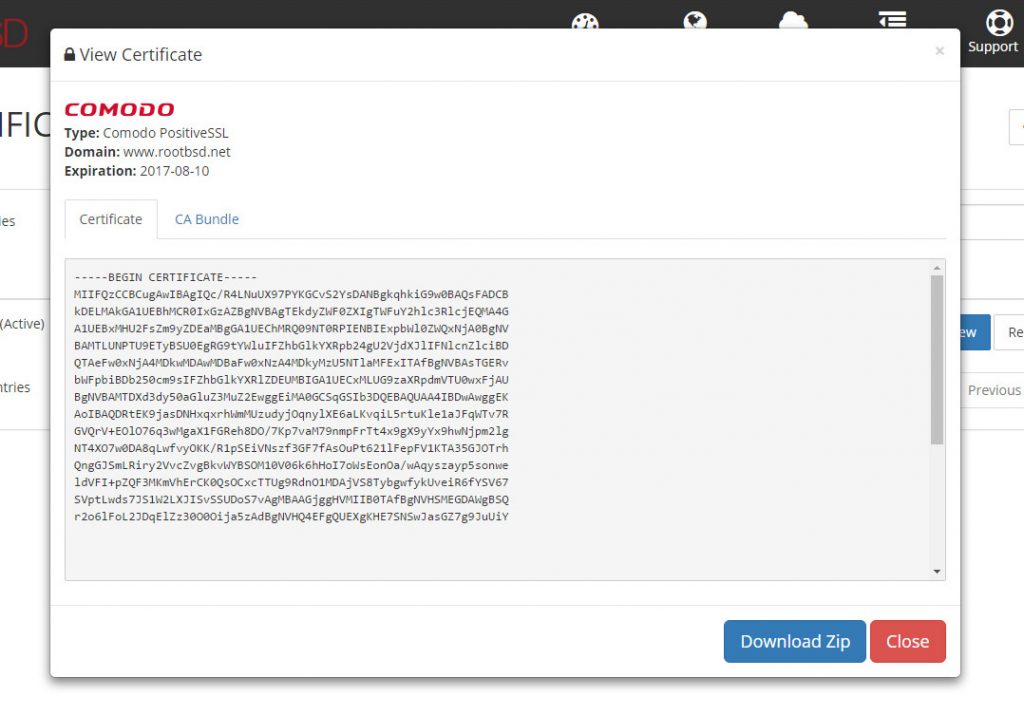
- Finally with your SSL Certificate showing Active on your account, click the View button the right hand side of the list to view your SSL Certificate. Depending on the SSL Provider you chose, there may also be a CA Bundle. And while the CA Bundle may not be 100% necessary to install your SSL Certificate onto your site, it is highly recommended as most modern browsers will report this as a potential security risk with a big, ugly warning to visitors of your site – which I’m sure you’d like to avoid!
Troubleshooting
If at any point of this purchasing process you experience any problems at all. Please do not hesitate to open a Support Ticket and we will do our best to assist you as soon as possible.
Note: This service will always be provided and free of charge to our customers with managed services.